![]()


![]()
![]() —-
—-
WhiteApp/QuickApp Onion architecture with ASP.NET Core
![]()
Onion Architecture
WhiteApp or QuickApp API solution template which is built on Onion Architecture with all essential feature using .NET Core!
Explore the docs »
Download from Marketplace
·
Report Bug
·
Request Feature
Give a Star! :star:
If you like or are using this project to learn or start your solution, please give it a star. Thanks!
Support This Project
If you have found this project helpful, either as a library that you use or as a learning tool, please consider buying me a coffee:

Table of Contents
- Onion Architecture
- About the Project
- Getting Started
- Features available in this project
- Project description
- Design patterns Used
- Contributing
- Licence Used
- Contact
- Support This Project
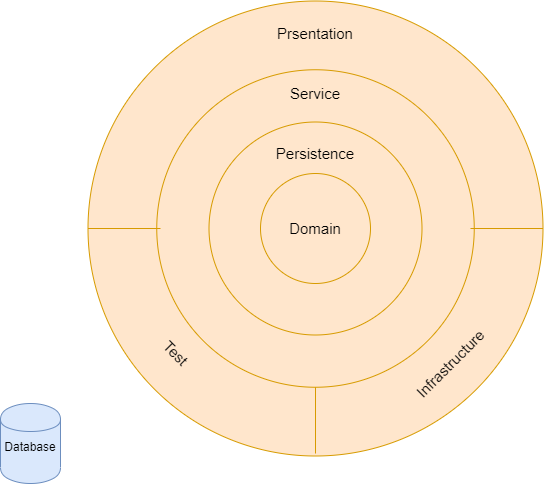
Onion Architecture
Onion Architecture was introduced by Jeffrey Palermo to provide a better way to build applications in perspective of better testability, maintainability, and dependability on the infrastructures like databases and services
Onion, Clean or Hexagonal architecture: it’s all the same. Which is built on Domain-Driven Desgin approach.
Domain in center and building layer top of it. You can call it as Domain-centric Architecture too.
Reference
- It’s all the same (Domain centeric architecture) - Mark Seemann
- Onion Architecture by Jeffrey Palermo
- Clean Architecture by Robert C. Martin (Uncle Bob)
- Hexagonal Architecture by Dr. Alistair Cockburn
About The Project
WhiteApp or QuickApp API solution template which is built on Onion Architecture with all essential feature using .NET Core.
Getting Started
Step 1: Download extension from project template

Step 2: Create Project
Select project type as API, and select Onion Architecture
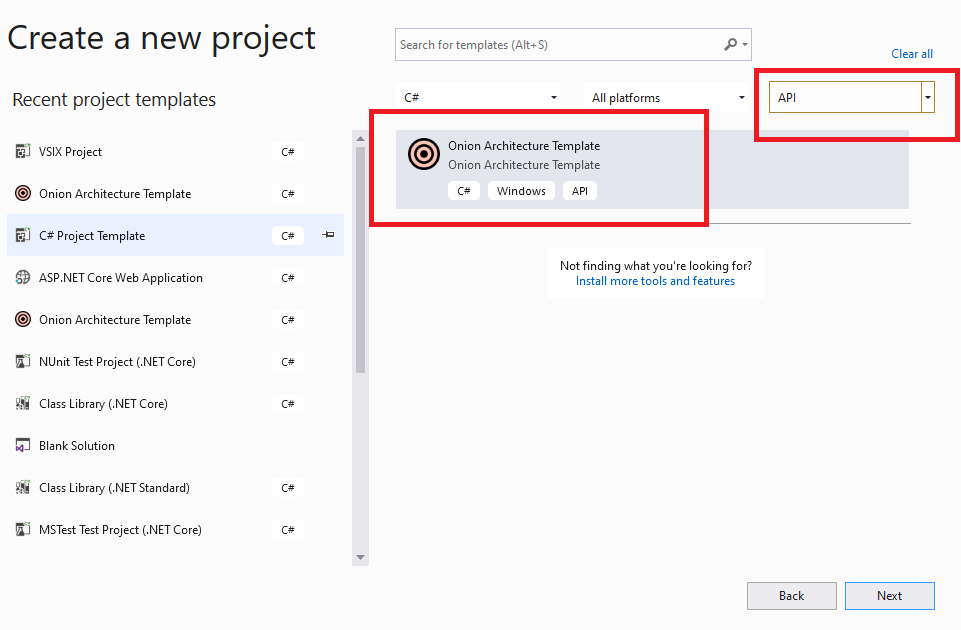
Step 3: Select Onion Architecture project template
Select project type as API, and select Onion Architecture
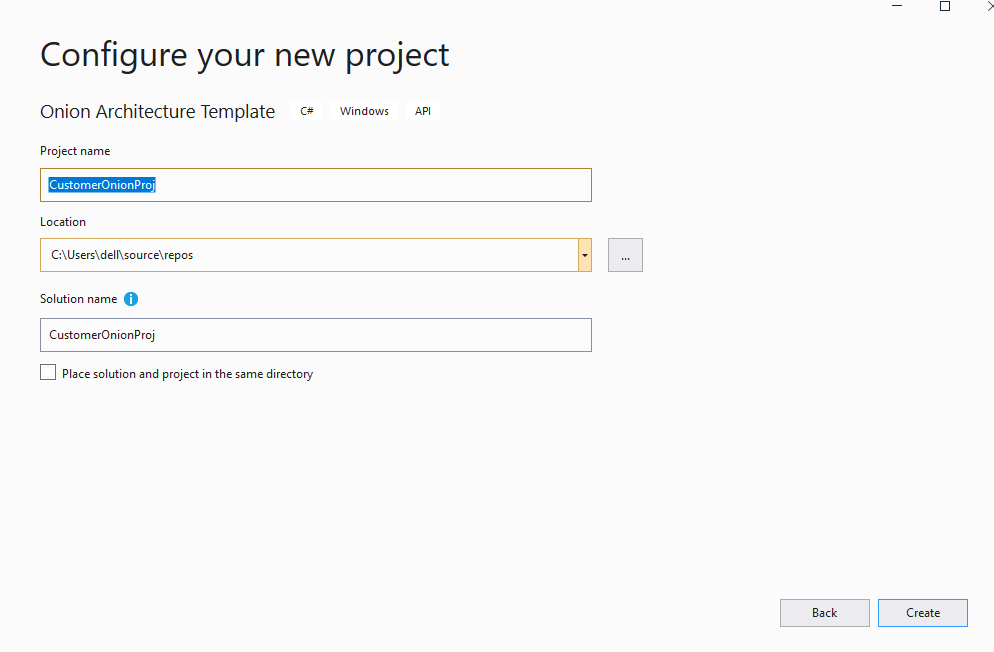
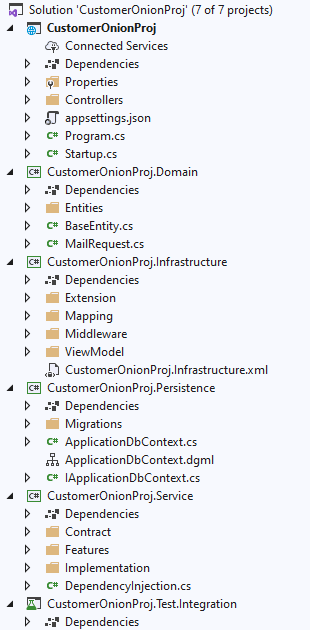
Step 4: Project is ready
Step 5: Configure connection string in appsettings.json
Make sure to connect proper database
  "ConnectionStrings": {
    "OnionArchConn": "Data Source=(local)\\sqlexpress01;Initial Catalog=OnionDb;Integrated Security=True",
    "IdentityConnection": "Data Source=(local)\\sqlexpress01;Initial Catalog=OnionDb;Integrated Security=True"
  },
and connect to logging in DB or proer path
  "Serilog": {
    "MinimumLevel": "Information",
    "WriteTo": [
      {
        "Name": "RollingFile",
        "Args": {
++          "pathFormat": "D:\\Logs\\log-{Date}.log",
          "outputTemplate": "{Timestamp:yyyy-MM-dd HH:mm:ss.fff zzz} [{Level}] {Message}{NewLine}{Exception}"
        }
      },
      {
        "Name": "MSSqlServer",
        "Args": {
++          "connectionString": "Data Source=(local)\\sqlexpress01;Initial Catalog=OnionDb3;Integrated Security=True",
          "sinkOptionsSection": {
            "tableName": "Logs",
            "schemaName": "EventLogging",
            "autoCreateSqlTable": true
          },
          "restrictedToMinimumLevel": "Warning"
        }
      }
    ],
    "Properties": {
      "Application": "Onion Architecture application"
    }
  },
Step 6: Create Database (Sample is for Microsoft SQL Server)
For Code First approach (To run this application, use Code First apporach)
-
For running migration:
- Option 1: Using Package Manager Console:
- Open Package Manager Console, select « ProjectName ».Persistence as Default Project
- Run these commands:
PM> add-migration Initial-commit-Application -Context ApplicationDbContext -o Migrations/Application
PM> add-migration Identity-commit -Context IdentityContext -o Migrations/Identity

PM> update-database -Context ApplicationDbContext
PM> update-database -Context IdentityContext

- Option 1: Using Package Manager Console:
-
Option 2: Using dotnet cli:
- Install dotnet-ef cli:
dotnet tool install --global dotnet-ef --version="3.1" - Navigate to OA and run these commands:
$ dotnet ef migrations add Initial-commit-Application --context ApplicationDbContext -o Migrations/Application
$ dotnet ef migrations add Identity-commit-Identity --context IdentityContext -o Migrations/Identity
$ dotnet ef database update --context ApplicationDbContext
$ dotnet ef database update --context IdentityContext
- Install dotnet-ef cli:
For Database First approach
In Package Manager console in « ProjectName ».Persistence, run below command
scaffold-dbcontext -provider Microsoft.EntityFrameworkCore.SqlServer -connection "Data Source=(local)\SQLexpress;Initial Catalog=OnionArchitectureDB;Integrated Security=True"
Step 7: Build and run application
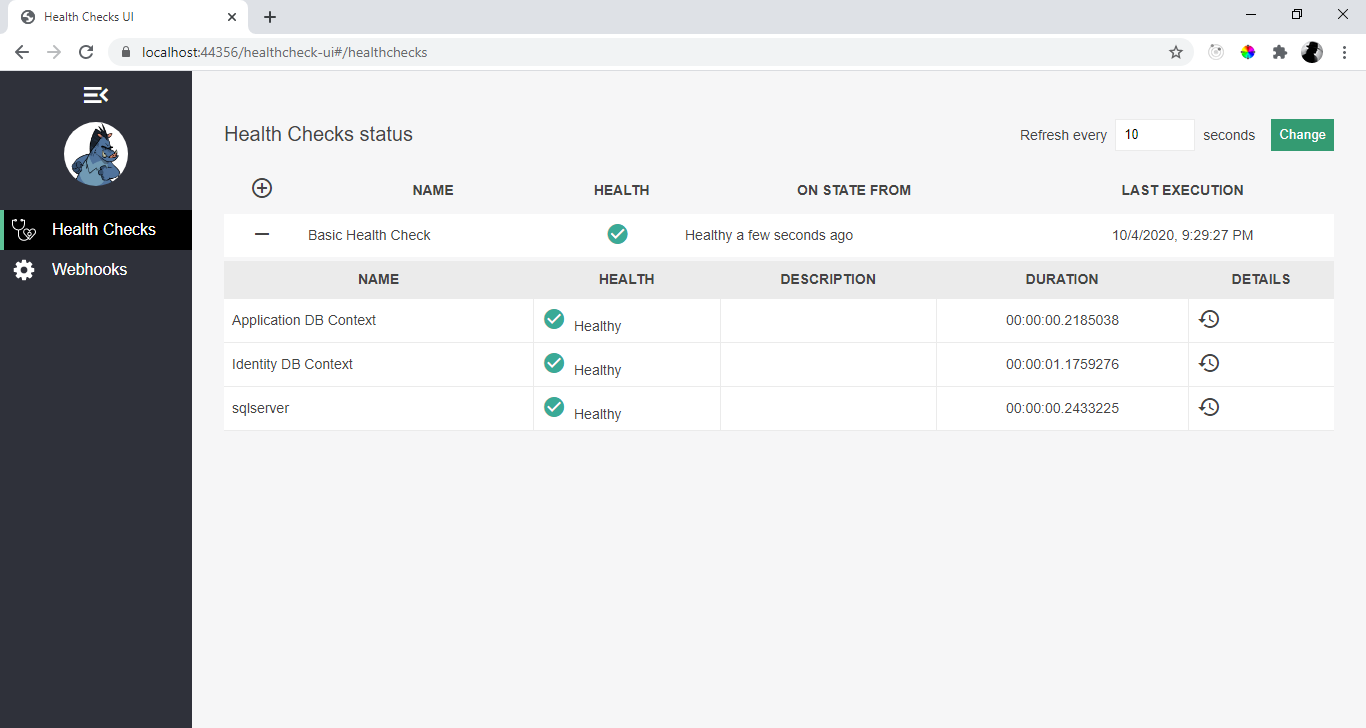
Health check UI
Navigate to Health Checks UI https://localhost:44356/healthcheck-ui and make sure everything is green.
** Change port number according to your application
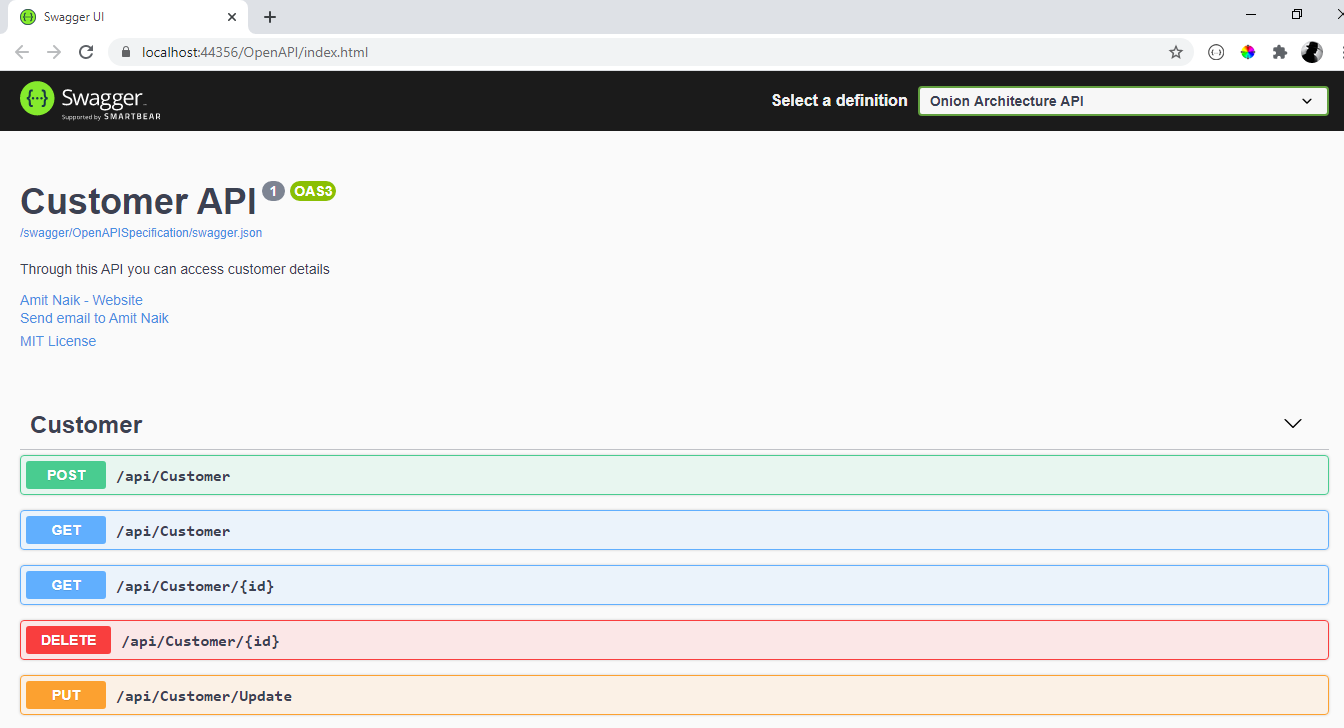
Swagger UI
Swagger UI https://localhost:44356/OpenAPI/index.html
** Change port number according to your application
Features available in this project
This is default white application for ASP.NET Core API development
This whiteapp contains following features, uncheck feature need to implement yet.
- Application is implemented on Onion architecture
- RESTful API
- Entityframework Core
- Expection handling
- Automapper
- Unit testing via NUnit
- Integration testing via NUnit
- Versioning
- Swagger UI
- CQRS Pattern
Below features will be implemented in infrastructure layer. You can plug and play based on your project.
- Loggings - seriLog
- Health checks UI
- JWT authentication with Microsoft Identity
- Role based Authorization
- Fluent validations
- Database Seeding
- Enable CORS origin
- Enable feature flag (Make it true when you configure your email configuration)
Project description
we can see that all the Layers are dependent only on the Core Layers
Domain layer
Domain Layers (Core layer) is implemented in center and never depends on any other layer. Therefore, what we do is that we create interfaces to Persistence layer and these interfaces get implemented in the external layers. This is also known and DIP or Dependency Inversion Principle
Persistence layer
In Persistence layer where we implement reposistory design pattern. In our project, we have implement Entityframework which already implements a repository design pattern. DbContext will be UoW (Unit of Work) and each DbSet is the repository. This interacts with our database using dataproviders
Service layer
Service layer (or also called as Application layer) where we can implement business logic. For OLAP/OLTP process, we can implement CQRS design pattern. In our project, we have implemented CQRS design pattern on top of Mediator design pattern via MediatR libraries
In case you want to implement email feature logic, we define an IMailService in the Service Layer. Using DIP, it is easily possible to switch the implementations. This helps build scalable applications.
Infrastructure Layer
In this layer, we add our third party libraries like JWT Tokens Authentication or Serilog for logging, etc. so that all the third libraries will be in one place. In our project, we have implemented almost all important libraries, you can plug & play (add/remove) based on your project requirement in StartUp.cs file.
Presentation Layer
This can be WebApi or UI.
Licence Used
![]()
See the contents of the LICENSE file for details
Contact
Having any issues or troubles getting started? Drop a mail to amit.naik8103@gmail.com or Raise a Bug or Feature Request. Always happy to help.